
Skip to content

Photography

The Two-Card Studio: Photograph a Diamond Ring Without Inventing Its Sparkle

A diamond ring can be a surprisingly difficult portrait subject. It refuses to sit neatly, reflects your camera, and sometimes turns into a white blob just when the gold band looks perfect. The usual response is more light, more sharpening, and more patience. Often, the better response is a piece of black card.

This small studio exercise uses two ordinary cards to make a ring easier to photograph. One opens up the reflections; the other gives them shape. The goal is a photograph that feels elegant while still showing the actual object, whether you are documenting a favourite ring or preparing an honest sale listing.

Build a tiny stage before touching the settings

Choose a stable table away from sinks and busy edges. Put a shallow tray underneath your working area so a loose ring cannot disappear across the floor. Use a plain, matte background and a discreet support that keeps the jewellery steady without covering important details.

A window with indirect daylight makes a useful starting point. Turn off nearby lamps if their colour clashes with the daylight. Alternatively, use one continuous light behind a suitable diffuser. Keep paper and fabric away from hot bulbs. A larger apparent light source generally produces broader, softer reflections than a tiny bare lamp.

Clean the ring only by a method suitable for its stones and setting. If you are unsure about treatments, loose stones, or delicate components, ask a jeweller first. For photography, removing obvious fingerprints safely matters more than experimenting with an aggressive cleaning recipe.

Let the white card do the polite work

Stand a piece of white card opposite the window, just outside the frame. It bounces some light towards the darker side of the ring. Move it closer, then farther away, watching the metal rather than the background. You are arranging a reflection, not simply increasing general brightness.

The band may suddenly acquire a smooth bright stripe. A prong that looked muddy might become readable. If everything becomes pale and flat, move the card back. Jewellery needs contrast to describe its shape. A perfectly even wash of white can remove the very edges you wanted to reveal.

Give the black card a small speaking part

Now introduce a narrow strip of matte black card beside the camera or near the ring, outside the composition. Watch for a darker line appearing in the polished metal. This is not a defect in the ring. It is a controlled reflection that helps separate one surface from another.

Move the strip in tiny increments. An oversized black reflection can overwhelm a small subject, while a restrained one makes a curved band look rounded rather than cut from white paper. The interesting moment often arrives between two positions you would normally consider almost identical.

Keep a simple record of the setup. Photograph the whole table with your phone after finding a useful arrangement. That unglamorous reference image can save more time next week than another elaborate preset.

Choose the viewpoint before chasing sharpness

A low angle can make a setting look architectural, but it can also hide the centre stone. A straight overhead view explains the outline but may flatten the band. Begin with a gentle three-quarter angle, then decide what the picture needs to communicate.

For an online listing, make several views rather than asking one photograph to explain everything. Show the face, the profile, the underside, and any identifying marks you can photograph clearly. A dramatic image and a practical reference image have different jobs. Give each enough room to do its work.

Use a tripod or another secure support when available. Set a timer or remote release to avoid nudging the camera. If you are working with a phone, resist moving closer than its camera can focus reliably. A slightly wider, sharp photograph usually beats a blurred frame that fills the screen.

Accept that close focus has a narrow comfort zone

At close distances, the area that appears sharp can become very shallow. The front prong may be crisp while the back of the stone dissolves. That is a focusing problem to manage, not evidence that your camera needs replacing.

For a clear introduction to working distance, stability, and the thin plane of focus, see Nikon’s guide to macro photography. Apply the principles to your equipment rather than copying somebody else’s settings blindly.

Try modest aperture changes and inspect the results. Very small apertures can increase depth of field but introduce diffraction softness. There is no universal number that makes every ring perfectly sharp. Camera format, magnification, lens behaviour, and the angle of the jewellery all influence the result.

Stack focus carefully, not automatically

When one exposure cannot provide enough detail, photograph a sequence with small, overlapping changes in focus. Keep the ring, camera, exposure, and lighting consistent. Then combine the sharp areas using suitable software. This works best when nothing shifts between frames.

Adobe explains the relevant blending workflow in its guide to creating composite images with extended depth of field. Treat the combined image as a starting point: inspect prongs, facet edges, and reflections for halos or mismatched patches before exporting.

A stacked photograph is a composite, not a single instant of focus. For documentary or sales use, keep the originals and be transparent about substantial processing. Extra apparent sharpness should explain the ring, not invent details that were never there.

Make one ordinary frame

Before packing up, take a straightforward photograph without the carefully arranged cards. Keep it as a companion to the polished version. This gives you a useful reminder of how strongly the surroundings shaped your studio result. It also helps prevent the mistake of judging a gemstone from one particularly dramatic picture. If the image is for a buyer, describe the lighting plainly and include that simpler view when helpful. You are offering visual information, not a laboratory assessment. Photography can reveal texture, workmanship, and character beautifully; it cannot independently establish a diamond’s origin, treatment history, or quality grades.

Edit the photograph without redesigning the jewellery

Adjust white balance, exposure, and cropping with restraint. Remove dust from the background if necessary, but do not erase identifying inclusions, scratches, or wear from a sale image. Keep meaningful characteristics visible. A flattering photograph should not become an alternative version of the product.

Finish by looking at the image at its intended display size. If it still communicates the stone, setting, and condition clearly, the two cards have earned their place. Pack the ring away safely before dismantling the studio. The most successful session ends with a useful, accurate, engaging picture and every small precious thing accounted for.…

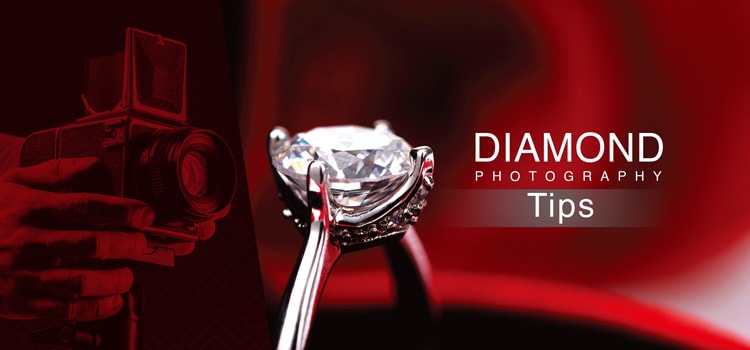
Award Winning Diamond Photography | The Best Photographers Work Hard

Diamonds, the most precious gemstones on Earth, have fascinated and captivated people for centuries with their unparalleled beauty and brilliance. Award-winning diamond photography is a niche art form that celebrates the magnificence of these gemstones through the lens of a camera. In this article, we will delve into the world of award-winning diamond photography, exploring the talented individuals behind the lens, the pros and cons of this specialized field, and offering tips on how to capture the stunning allure of diamonds through photography.


The Artists Behind Award-Winning Diamond Photography

Award-winning diamond photographers are a select group of talented individuals who have mastered the art of capturing the radiance and intricacies of diamonds. These photographers possess a unique blend of technical skill, creativity, and a deep appreciation for the allure of these precious gems. Some notable names in this field include:


Johan Bergström: Known for his innovative use of light and shadow, Johan Bergström’s diamond photography creates a sense of depth and drama that is truly captivating. His work has won numerous awards and graced the pages of prestigious jewelry magazines.


Anna Kim: With a background in both jewelry design and photography, Anna Kim brings a keen eye for detail and composition to her diamond photography. Her images are celebrated for their elegance and precision.


Daniel Rodriguez: Daniel Rodriguez is renowned for his ability to capture the play of light within diamonds, showcasing their fire and brilliance. His work often features diamonds in motion, highlighting their scintillation.


Harold McFarlane: Harold McFarlane is an award-winning gem and jewelry photographer known for his exceptional attention to detail. His meticulous approach to diamond photography allows him to capture the smallest facets and intricacies of each gem, revealing their unique qualities.


Elena Baranoff: Elena Baranoff is an accomplished jewelry and diamond photographer known for her expertise in lighting and composition. She often uses vibrant colors and innovative lighting techniques to create captivating images that emphasize a diamond’s beauty.


Pros and Cons of Diamond Photography

Pros and Cons of Diamond Photography


Pros:

Eternal Beauty Preservation: Diamond photography allows us to immortalize the timeless beauty of these gems, preserving their magnificence for generations to come.


Marketing and Sales: High-quality diamond photographs are essential for jewelry businesses. They serve as marketing tools to attract potential buyers and showcase the craftsmanship of the jewelry.


Artistic Expression: Diamond photographers have the opportunity to merge artistry and technique, creating visually stunning and emotionally resonant images.


Technical Skill Development: Mastering diamond photography hones photographers’ technical skills, such as lighting, macro photography, and post-processing.


Cons:

Challenging Lighting: Diamonds’ high refractive index and extreme brilliance can make it challenging to capture their true beauty without proper lighting techniques.


Expensive Equipment: High-quality diamond photography often requires specialized equipment, such as macro lenses, lighting rigs, and editing software, which can be costly.


Demanding Post-Processing: Achieving perfection in diamond images often requires extensive post-processing work to remove imperfections and enhance brilliance.


How to Take Good Photos of Diamonds

Capturing the essence of a diamond in a photograph is an art that demands patience, precision, and attention to detail. Here are some tips to help you take good photos of diamonds:

Diamond Photography Tips


Choose the Right Equipment:

    • Camera: Use a digital single-lens reflex (DSLR) camera or a high-quality mirrorless camera for better control over settings and image quality.
    • Lens: Invest in a macro lens or extension tubes for close-up shots. Macro lenses allow you to capture the intricate details of the diamond.
    • Tripod: A stable tripod is essential to eliminate camera shake and ensure sharp, clear images.


Prepare the Diamond:

    • Clean the diamond: Before shooting, ensure the diamond is free from dust, fingerprints, and smudges. Use a soft, lint-free cloth and a gentle cleaning solution to clean the diamond.
    • Handle with care: Use clean, lint-free gloves or tweezers to handle the diamond to prevent smudges and fingerprints.


Lighting is Key:

    • Soft, diffused lighting: Avoid harsh direct sunlight or artificial light sources. Instead, use soft, diffused light to minimize reflections and highlights. A lightbox or softbox is ideal for creating even lighting.
    • Side lighting: Position the light source at a slight angle to the diamond to create shadows and emphasize facets. Experiment with different angles to find the most flattering lighting.


Background and Setup:

    • Choose a neutral background: A white or gray background allows the diamond to be the center of attention. Use a light tent or sweep to create a seamless backdrop.
    • Use a tripod: A stable camera setup is crucial for sharp, focused shots. Use a remote shutter release or a timer to minimize camera shake when taking the shot.


Camera Settings:

    • Aperture (f-stop): Use a small aperture (higher f-number like f/16 or f/22) to maximize depth of field and ensure the entire diamond is in focus.
    • Shutter speed: Use a slow shutter speed (longer exposure time) to allow enough light to enter the camera without overexposing the image. A tripod is essential to prevent camera shake with longer exposures.
    • ISO: Keep the ISO as low as possible (typically 100 or 200) to maintain image quality and reduce noise.
    • Focus: Use manual focus to ensure precise control over the focal point. Zoom in on the diamond’s surface to check for sharpness.


Composition:

    • Experiment with different angles and perspectives to highlight the diamond’s unique features.
    • Showcase the diamond’s facets and reflections, capturing its brilliance and fire.
    • Consider using props or other jewelry items to add context and visual interest to the shot.


Post-Processing:

    • Use photo editing software (e.g., Adobe Photoshop) to fine-tune your images.
    • Adjust exposure, contrast, and color balance as needed to enhance the diamond’s brilliance.
    • Remove any dust spots or imperfections using the spot healing brush or cloning tool.


Practice and Patience:

    • Diamond photography can be challenging, so practice is key to improving your skills.
    • Experiment with different lighting setups, camera settings, and compositions until you achieve the desired results.


Conclusion

Award-winning diamond photography is a mesmerizing blend of art and technical expertise, elevating these precious gems to new heights of visual appreciation. Through the work of talented photographers like Johan Bergström, Anna Kim, and Daniel Rodriguez, we can explore the dazzling world of diamonds from the comfort of our screens. Whether you are an aspiring diamond photographer or simply an admirer of these radiant gemstones, the world of diamond photography offers a window into the eternal beauty of these Earth’s treasures.…